Git rebase and Editing Past Commits using Interactive rebase - An Opensource Special
Introduction
Git version control is now a standard tool in the toolbox of every modern developer. Our fingers' muscle memory now includes commands like git add, git commit and git push. But despite how useful the "more advanced" Git features can be, not many developers are aware of them.
We'll examine "rebase, merge, interactive rebase to edit commit messages, delete, reorder, squash, and split commits. Finally, we'll discuss the importance of being cautious when overwriting history and offer tips for using rebase effectively in collaborative projects.," one of Git's most potent tools, in this blog post.
What is rebasing?
Rebasing is the process of moving a branch to a new base commit. It is a way of integrating changes from one branch into another by reapplying each commit in the branch to a new base commit.
Intuition for rebase
Rebase intuition Imagine you have a branch, feature, that you branched off from the main branch a few weeks ago.
During that time, other developers have made several changes to the main branch. Now you want to integrate these changes into your feature branch without losing your own work.
Rebasing can help you achieve this by moving your branch to the new base commit (the most recent commit in the main branch), essentially making it look like you started working on your branch after the changes were made.
Let's understand how we can rebase a branch by doing it along:
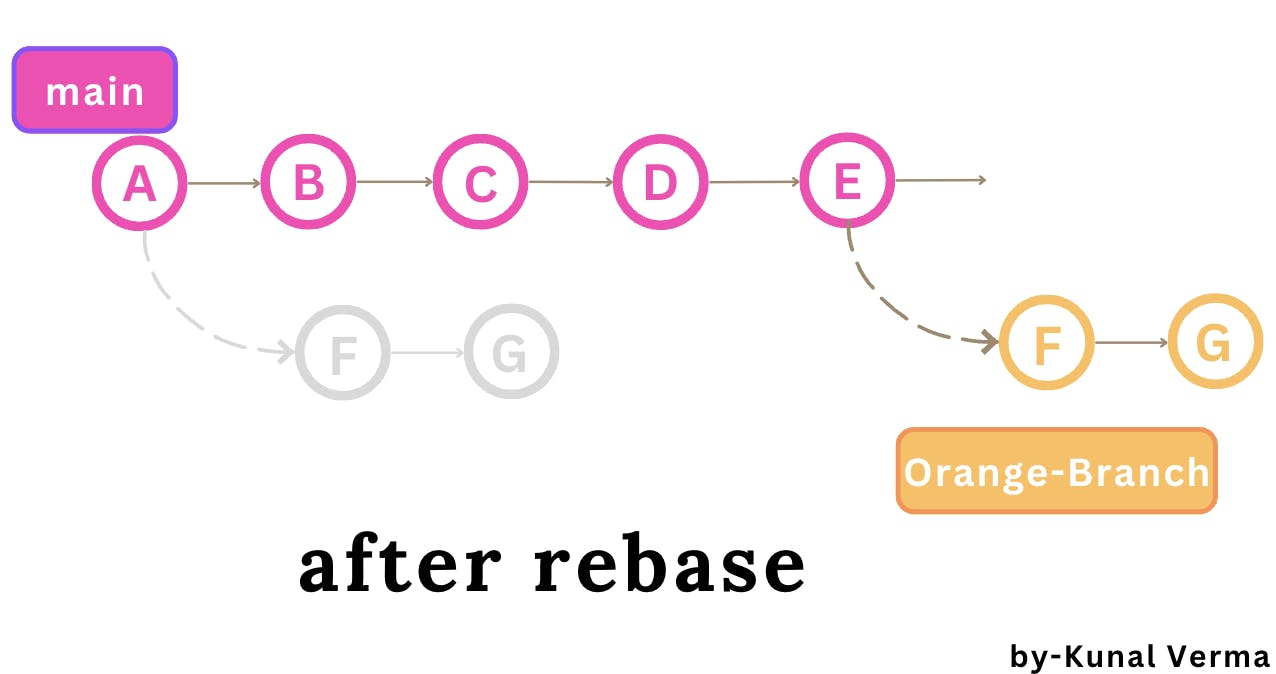
-> Initially, we are at the main branch with commit A.
$ git checkout main
-> Next, we will branch out from the main branch to create and switch to a new branch called orange-branch.
$ git checkout -b orange-branch
-> We make two commits F and G on our branch.

-> While we are working on the orange-branch, several other contributors work on the main branch and make several commits (B, C, D, E).

-> Now, we want to get all the changes in the main branch without losing our own commits F and G, rebase will help us in this task, our orange-branch needs to rebase on the last commit E of the main branch. First, we need to pull the changes to the main branch (assuming that we are working in an open-source project).
$ git checkout main
$ git pull // To keep main branch up to date

-> After pulling changes, we should switch back to the orange-branch and rebase it on the main branch.
$ git checkout orange-branch
$ git rebase origin/main

By rebasing, we apply our commits F and G on top of the main branch's latest changes. This process ensures that the orange-branch has all the changes from the main branch without losing our own commits.
Note: It is recommended to push the changes after rebasing and resolving any conflicts that may arise.
-> Resolving conflicts If there are any conflicts, resolve them by editing the affected files and committing the changes.
$ git add .
$ git rebase --continue
What happens in merge then? How is it different from rebase? 🧐
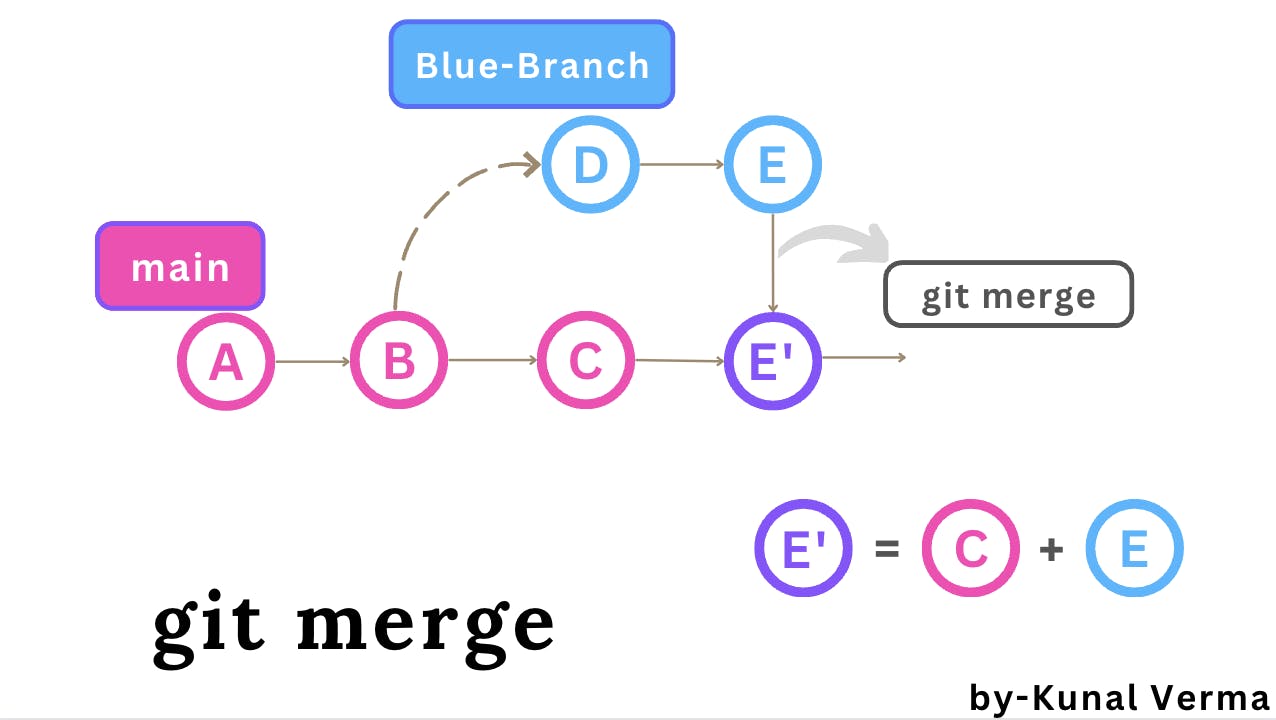
Git merge and rebase are two different ways which can be used to merge changes of different branches in the repository.
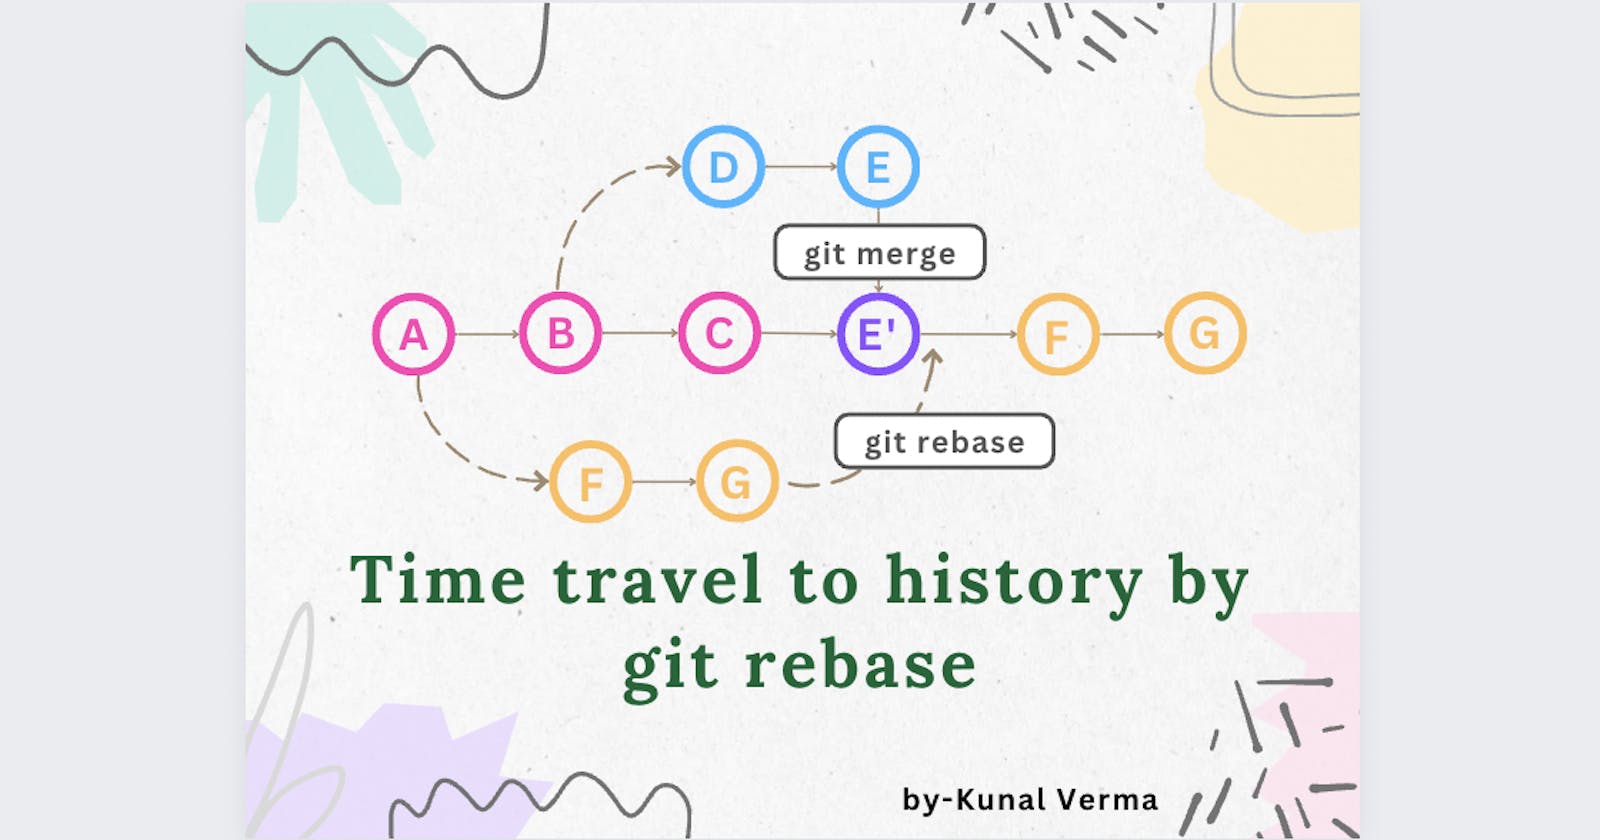
Merge: Merging creates a new commit at the end of the branch that contains the changes from both branches. This new commit has two parent commits, one from each branch. This means that the code changes from all the commits on the other branch are included in this final commit. Merging creates a graphical history that might be a bit complex to understand. It merges all the commits from the other branch as a single commit.

Rebase: Rebasing does not create any new commit. Instead, it moves the original commits to a new base commit and applies the changes from one branch onto another and presents it as though the changes were made directly on that branch. It creates a linear track of commits with a clear history of changes.
What is interactive rebase and why should I use it?
To put it briefly and without exaggeration, interactive rebase can make you a better developer by enabling you to build a clear and organised commit history in your projects.
Why is it important to have a well-organized commit history?
Imagine the opposite, a difficult-to-read commit history in which you have no idea what your colleagues did with their recent changes. You only understand the small parts that you worked on yourself.
In contrast, a clean and well-structured commit history helps to make a project's codebase more readable and understandable. This is a necessary component for a healthy, long-lasting project!
How can interactive rebase help us achieving well organised commit history?
It covers a wide range of use cases, some of which enable you to:
edit an old commit message
delete a commit
reorder commits
squash/combine multiple commits
split/reopen old commits for editing
Seems Interesting, Let's see how...
Step-0 -> use git log --oneline to view the list of commits to view commit history.

Okay, let me explain it more simply. Imagine you have a branch called "test" and you made 5 commits on it. Now, you want to change the message of the 4th commit i.e. "add a.txt".
edit an old commit message

Step-1 -> run
$ git rebase -i HEAD~5
This will show an interactive window with 5 commits back from HEAD in reverse order.
Step-2 -> change 'pick' to 'reword' for the commit message you want to edit.

you may not be able to write anything in this window.
Step-1 -> click "i" to enter into insert mode.
Step-2-> after changing pick to reword click "esc key" to escape insert mode. Step-3-> then to save and exit this window run ":wq" .
Step-3 -> Modify the commit message in the text editor that opens automatically. Save and close the file. using :wq .

see the complete process here 👇:

Step-4 -> run this command to continue the rebase process.
git rebase --continue
Git will now apply the changes and update the commit history with the new message.

Mission successful we edited our commit message from add a.txt to chore: adding textfile a.txt.
delete a commit

Step-1 -> run git rebase -i HEAD~5
Step-2 -> change pick to drop for the commit you want to delete/remove.
Step-3 -> save and exit using :wq .

Git will now start the rebase process and skip the commit you deleted.

Git will apply the remaining commits and update the commit history accordingly.
reorder commits
For reordering let's first create deleted commit again and then reorder it to it's position back.

Step-1 -> run git rebase -i HEAD~3
Step-2 -> reorder the commits by changing the order of their lines in the interactive window. (remember the order in interactive window is reversed)
Step-3 -> save and exit using :wq .

Git will now start the rebase process and apply the commits in the new order.

Git will apply the reordered commits and update the commit history accordingly.
squash/combine multiple commits
To combine some small commits into a single commit. Let's understand by doing it along and combining last two commits.

Step-1 -> run git rebase -i HEAD~5
Step-2 -> change pick to squash. (for example, if you want to squash the two commits into a single commit, change the second line to squash and it will combine with commit just above.)
Step-3 -> save and exit using :wq .
Step-4 -> git will automatically open a text editor allowing you to edit the commit message of the new combined commit. Modify the message as desired, save and close the file.


Git will now apply the changes and update the commit history with the new combined commit.

To combine add b.txt and adding text to b.txt 👆.
split/reopen old commits for editing
The edit option allows for amending the commit. Amending means, commits can be added or changed entirely. We can also make additional commits before rebase continue command. It allows us to split a large commit into the smaller commit. moreover, we can remove erroneous changes made in a commit.
Step-1 -> run git rebase -i HEAD~3
Step-2 -> change pick to edit for the commit you want to modify.
Step-3 -> save and exit using :wq .
Step-4 -> now, you can make changes to code, add files, commit these changes, split changes in several commits.
Step-5 -> save and complete rebase using git rebase --continue once satisfied with the changes.

Git will now apply the changes and update the commit history with the reopened commit.

Warning: Overwriting History can have serious consequences ☠️🔴.
By rewriting irreversible history, you're essentially discarding old commits and generating new ones that may be similar but distinct. If others have built their work on your earlier commits, and you rewrite and force-push them, your team members may need to re-merge their work (if they realize the risk of losing their progress).
Using rebase is advised for commits that aren't shared with other team members, and it should only be utilized on branches that belongs to us.
Conclusion
Tracking changes in software development is crucial for smooth workflow and team synchronization. However, managing multiple contributors can lead to a messy commit history. Enter Rebase - a lifesaver for developers in open-source communities or large-scale projects. It allows users to reorganize their commit history for easier tracking and understanding of code evolution.
Rebase offers a crucial advantage for developers by enabling them to maintain a well-structured and tidy commit history. Unlike a cluttered and disorganized record of modifications, Rebase empowers users to group interconnected changes and present them in a clear and rational manner. As a result, it simplifies the process of tracking changes and facilitates the comprehension of the reasoning behind the creation of a specific feature or function.
Rebase can help make code reviews smoother and more efficient by organizing and grouping related changes, making it easier for developers to identify which changes need to be reviewed.
In summary, Rebase is an invaluable tool for developers looking to maintain a clean, organized, and easily readable commit history. Whether working in an open-source community or collaborating with others on a large-scale project, Rebase can help streamline the development process and ensure that everyone is on the same page.
-> checkout this amazing video for more understanding - GIT & Github Advance: Awesome Features, Rebase, Merge, Resolve Merge Conflict
-> To ease your process use GUI, view tutorial - GitKraken.
Thank you for taking the time to read my content! I am thrilled to hear that you found it valuable and informative. If you would like to stay updated on my latest posts and insights, please consider sharing, subscribing newsletter and following me on social media. Your support means the world to me!
