

It is the most difficult for a beginner to create multiple pull requests in GitHub they say that the new commits merge with the Previous Pull Request. They often request maintainers to quickly merge it so that they can work on the new issue and create another PR.
In this blog, we'll learn how to raise multiple pull requests in a single repository without letting the commits go in the same pull request. This is a crucial skill for developers who work with open-source projects or collaborate with others on the same codebase.
For those familiar with raising pull requests
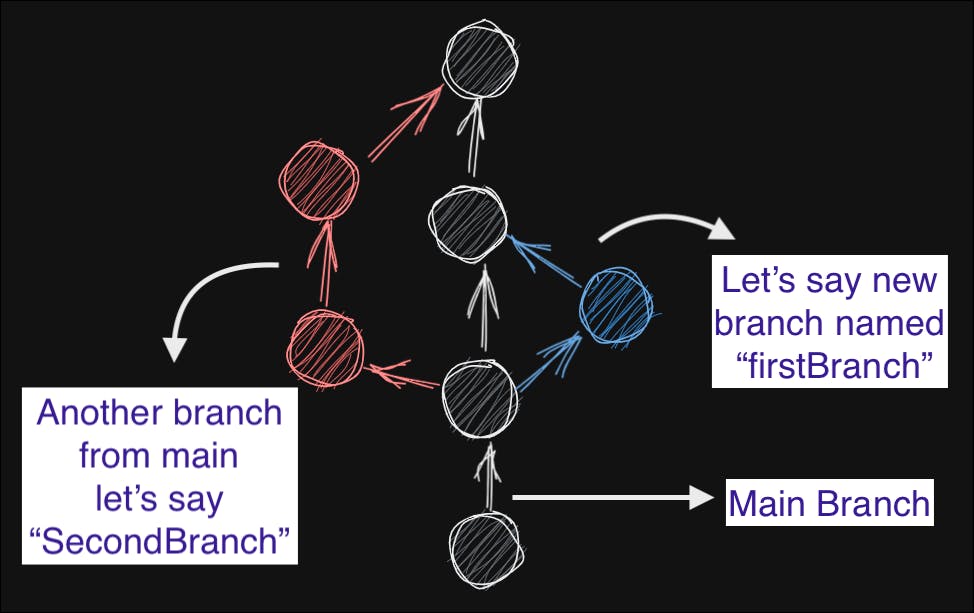
It's as simple as creating a new branch from the main branch, making changes in that branch, and then creating a pull request. After that, you switch back to the main branch, create another branch, make changes, and create another pull request. Repeat these steps for as many pull requests as you need. Now you have created two different pull requests with different commits.
For those who are new to raising pull requests, let's start with the basics.
Step 1: Fork and Clone the Git-First-Contributions Repository.
The first step is to fork the repository you want to contribute to and clone it in Visual Studio Code (or your preferred code editor).
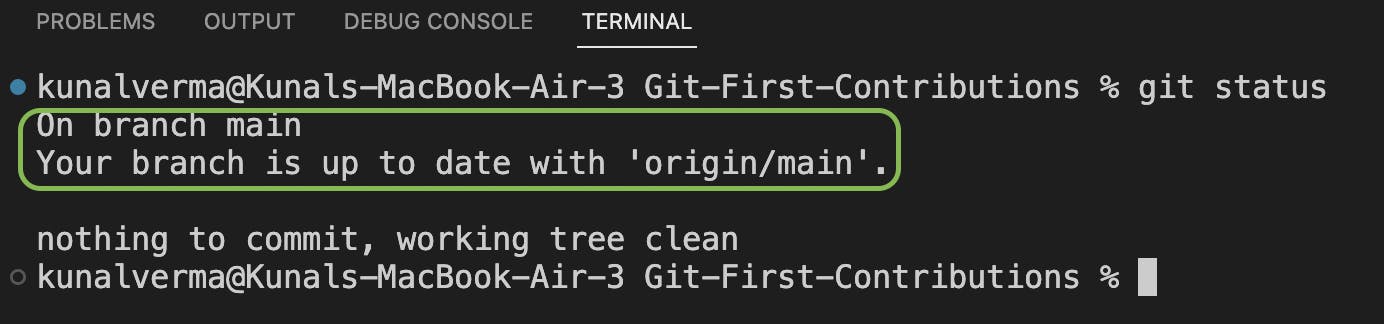
Step 2: Check the Current Branch
Once you've cloned the repository, open the terminal and confirm that you're on the main branch by typing.
git status
Output->
Step 3: Create a New Branch
Next, create and move to a new branch by typing
git checkout -b "<branchname>"
Check the branch you're on by typing git status.
Output->

Step 4: Make Changes in the Code
Now that you're on a new branch, make the desired changes in the code. Create a file, `<yourname>.json`.
{
    "name" : "<Your Name>",
    "intro": "I am web developer.",
    "github": "https://github.com/<your github username>",
    "linkedin": "https://www.linkedin.com/in/<your linkedin username>/"
}
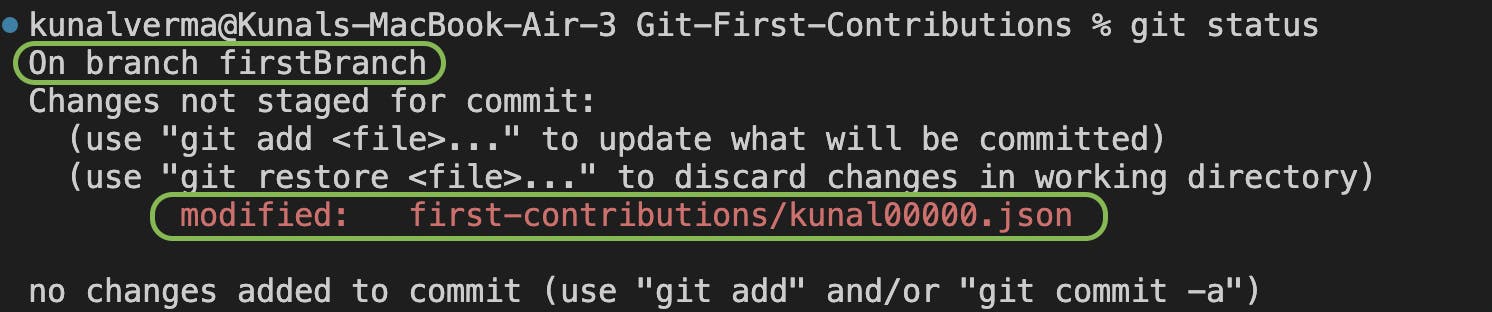
Output-> Save the changes and Check the Status. your output can be different so don't worry. In this, we see that `kunal00000.json` is modified.
Step 5: Stage the Changes.
To stage the changes, use the command git add -A to stage all the files that have been changed, or use
git add <filename>
to stage specific files. Replace <filename> with the name of the file you want to stage.
Output->

Step 6: Commit the Changes
Commit the changes with the command
git commit -m "commit message".
Output-> In the commit you should always write something logical, that may depict what changes you made.

Step 7: Publish the Branch and Push the Changes
Publish the branch and push the changes by using the command. Replace <branchname> with the name of the branch, you created in step 3.--set-upstream is used while publishing, it is done only once for further changes you need to push changes using this command git push -u origin <branchname>
git push --set-upstream origin <branchname>
Output->

Step 8: Create a Pull Request
Go to GitHub and create a pull request.

Step 9: Switch Back to the Main Branch
Switch back to the main branch by command to switch between branches.
git checkout <branchname>
Output->

Step 10: Repeat the Steps for Another Pull Request
Repeat the steps from step 3 to step 8 to create another pull request.
You can check all the branches from the main branch by using the command git branch.

Conclusion
In conclusion, raising multiple pull requests in a single repository is a straightforward process. By following simple steps:
1. create and move to a new branch
2. make changes
3. create a pull request
4. move back to the main.
5. Repeat these.
you can effectively work on multiple issues in open-source projects if there is some delay in merging previous pull requests, So you need not wait for pr to get merged and then hop to work on a new issue or collaborate with others on the same codebase.