Setup and Collaboration using Github Codespaces

Opensource | Web Developer
If you haven't read my blog on the Power of GitHub Codespaces, do check it out (unleash the power of codespaces).
We have talked about its features, requirements and how can you use it in your favour 😎.
Now let's start with creating a codespace...
Creating your first CodeSpace.
- Navigate to the repository you want to work on, and click the <>Code button, then click the Codespaces tab.

- Click the ellipsis (...) at the top right of the Codespaces tab and select New with options. On the options page for your codespace, choose your preferred options from the dropdown menus.

- Click Create codespace.
Opening an existing codespace
Navigate to the "Your codespaces" page at github.com/codespaces.
To open a codespace in your default editor, click the name of the codespace.
To open the codespace in an editor other than your default:
Click the ellipsis (...) to the right of the codespace you want to open.
Click Open in.
Click Open in APPLICATION.
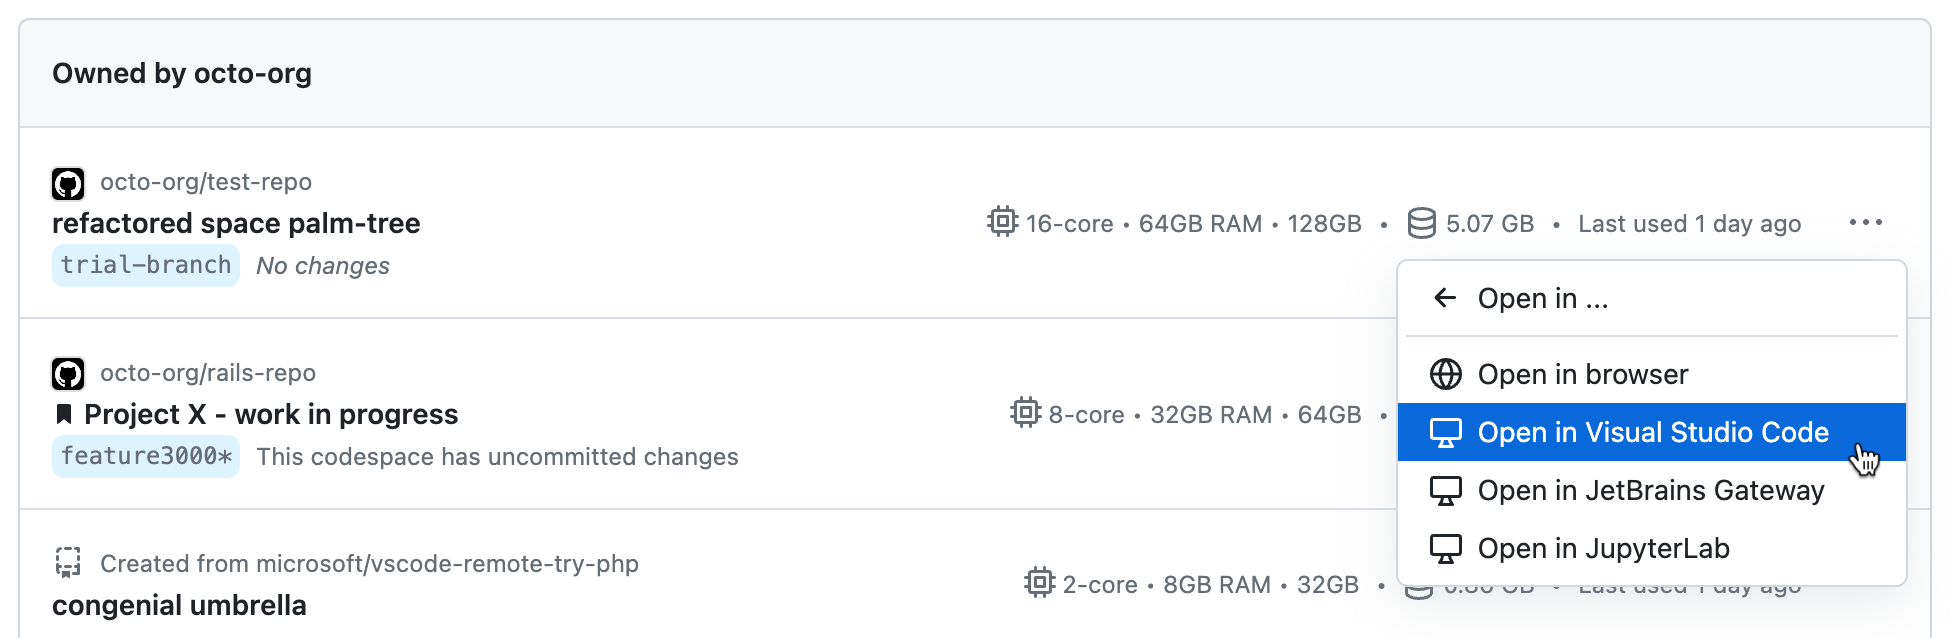
You can open the codespace in:
Your browser
Visual Studio Code
JetBrains Gateway
JupyterLab
If you choose Visual Studio Code or JetBrains Gateway, you must make sure you have installed the selected application on your local machine.
Customising your CodeSpace
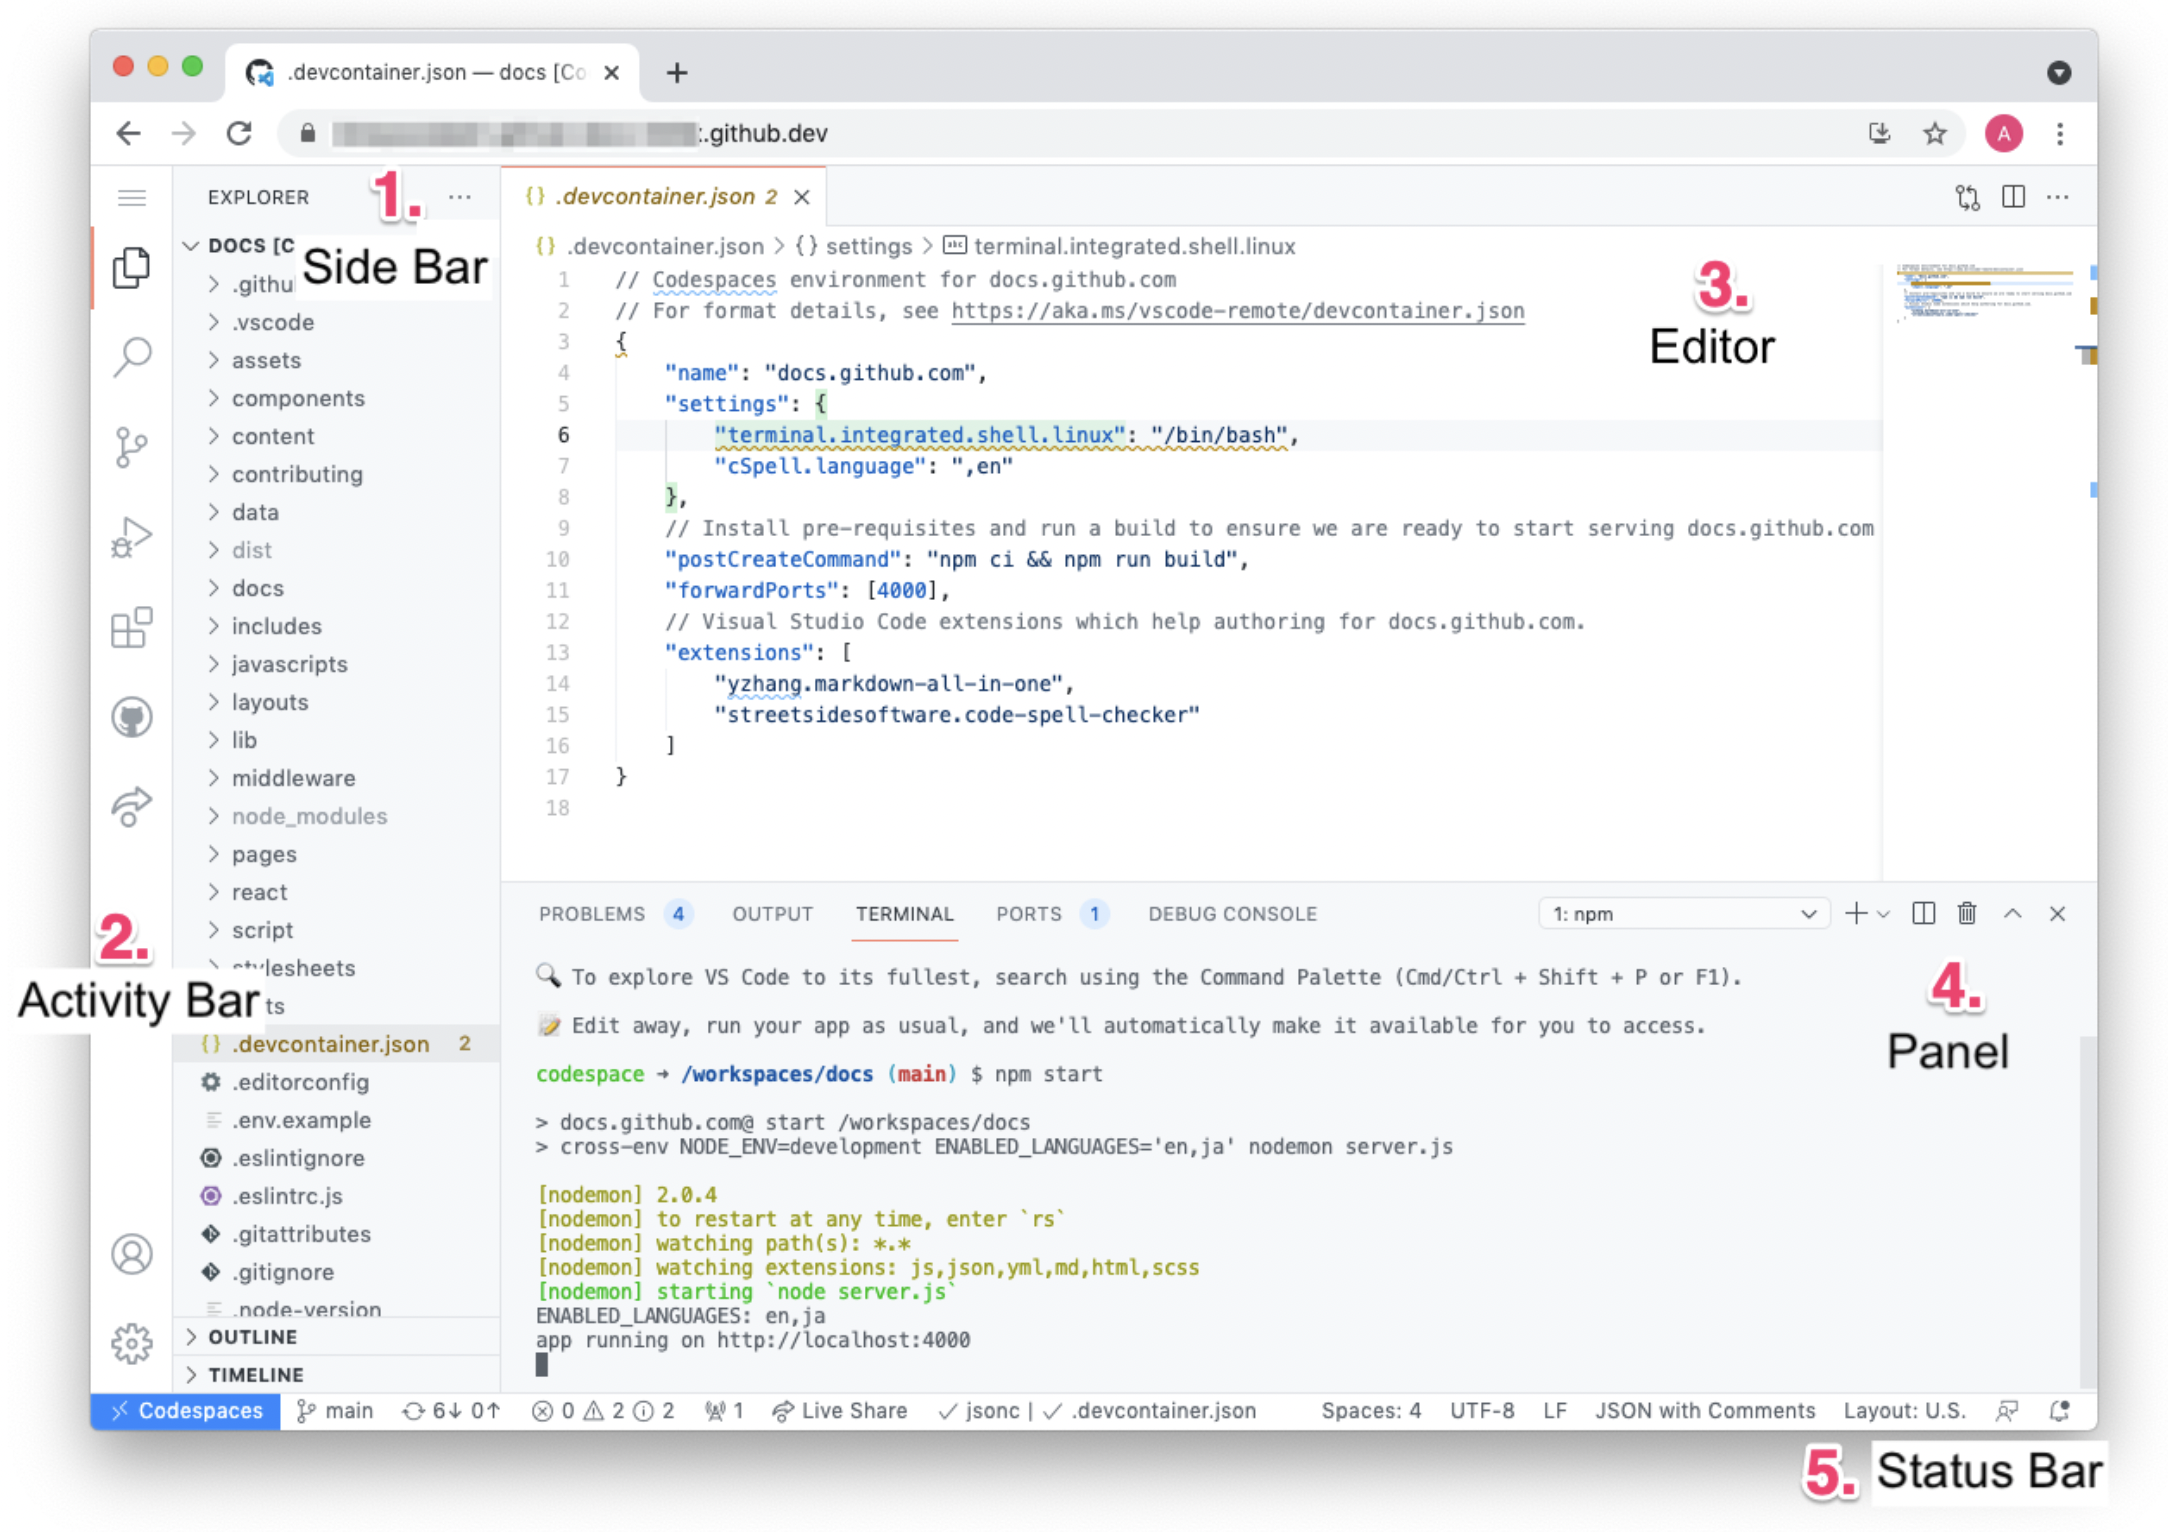
The codespace we created using GitHub is the default docker image. So what we will do next is create a few configuration files so that we can customise the default image. Open the codespace in VS-Code.
Access the Visual Studio Code Command Palette (
Command+Shift+P/Ctrl+Shift+P), then start typing "dev container". Click Codespaces: Add Development Container Configuration Files.
Click Show All Definitions.

Select the Ubuntu version to use.

Click the latest version of Ubuntu.

Select the additional features to install inside of the dev container, then click OK.

A
devcontainer.jsonfile is created and is opened in the editor.


